


Making patterns
This unit introduces students to the notion of a repeating pattern. Students are encouraged to create, describe, and continue patterns.
About this resource
Specific learning outcomes:
- Make patterns that involve translations, reflections, and rotations.
- Identify translations, reflections, or rotations in patterns.
Making Patterns
Achievement objectives
GM1-5: Communicate and record the results of translations, reflections, and rotations on plane shapes.
Description of mathematics
Translations (slides), reflections (flips), and rotations (turns) are explored in this unit.
Translations are slides or shifts of a shape along a line.
Reflections are flips of a shape to make an image look as though it is reflected in a mirror.

Rotations are turns, so when a shape is turned about a point, either inside or outside of itself, the image is a rotation of the original shape. This unit uses examples where the rotation happens around the centre point of a shape.
Opportunities for adaptation and differentiation
The learning opportunities in this unit can be differentiated by providing or removing support for students and by varying the task requirements. Ways to make the tasks more accessible include:
- In session 1, show students how to make the first translation of an object before asking them to independently create patterns using translation. You could also begin by translating a real object and drawing around it before introducing a stamp pad.
- In session 3, focus on two or three examples of rotations using objects before introducing pictures that show rotations.
- Students can work in multileveled pairs and small groups to share their thinking.
- Digital tools can be used to rotate, reflect, and translate objects.
- Large foam shapes or images can be used outside as a class to show translation, reflection, and rotation.
The objects and pictures used in this unit can be changed to suit the interests and experiences of your students. For example, local flowers and pictures of native insects and butterflies are likely to be more engaging than generic pictures of flowers and butterflies. You could also incorporate an outdoor walk where students look for examples of translations, reflections, and rotations. Images of native plants, animals, butterflies, and marine mammals can be found at: Doc Native Plants, Doc Native Animals, Native Butterflies Slideshow and Native Marine Mammals.
Te reo Māori vocabulary terms such as neke (translate), whakaata (reflect), and huri (rotate) could be introduced in this unit and used throughout other mathematical learning.
Required materials
- Wallpaper or wrapping paper with translation pattern
- Stamps and ink pad (stamps of native animals)
- White and blue A4 paper
- Pictures that show reflection patterns
- Mirror
- Scissors, glue, crayons
See Materials that come with this resource to download
- Making patterns (.pdf)
Activity
In this session, students make patterns that show translations.
1.
Show the students a piece of wallpaper, wall frieze, or wrapping paper that shows a translation pattern that they can relate to.
2.
Ask the students:
- What picture is repeated on the paper to make a pattern?
- Are the pictures the same each time? (Yes)
- How are the pictures the same? (shape, size, orientation, colour)
3.
Using A4 paper and stamps, students are to make their own translation pattern on the page. Ensure that the students keep the stamp oriented the same way as they make repeated stamps on the page.
In this session, students make patterns that show reflections.
1.
Show the students pictures that show reflections, for example, scenery reflections in lakes, butterfly wings, koru patterns, and kowhaiwhai patterns.
2.
Explain to the students that a reflection picture looks like it could be folded in half so the two sides match. Using a mirror on the fold to show students that the reflection is the same as on the other side.
3.
Colouring pictures of butterflies so the wings show a reflection pattern is a common and popular activity. Other ideas are: I make reflection patterns on the wings of paper planes, Māori designs, and native insects.
In this session, students make patterns that show rotations.
1.
Show the students pictures that show rotations, for example, kowhaiwhai patterns, starfish arms, flower petals, windmill blades, propeller blades, and bike spokes.
2.
Explain to the students that in these types of examples, part of the object has been turned around a centre point. Ask them to identify the part that has been rotated. For example, if you take one spoke on the bike wheel, leave one end at the centre, and turn the other end, it will rotate to the position of the next spoke.
3.
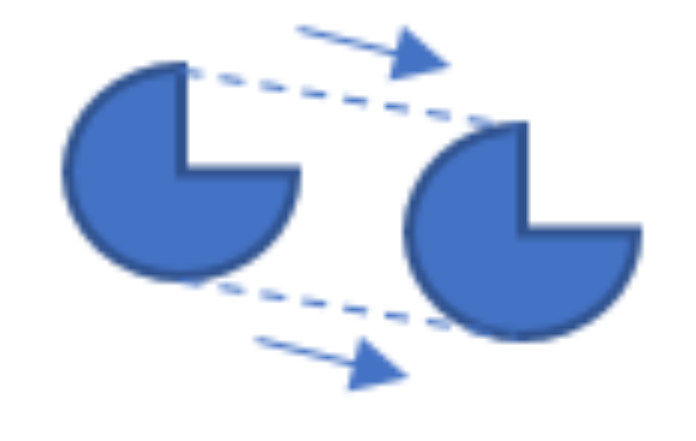
Show the students pictures where the object itself has been rotated, for example:
4.
Using the stamps and ink pads, students can show a rotation pattern where the whole object is rotated.
5.
Students can make patterns where part of the object is rotated. For example, drawing a flower by cutting out multiple petal shapes and glueing them around the centre, an aircraft with a nose, wing propellers that show blade rotation, starfish, and kowhaiwhai patterns.
In these sessions, students make an underwater sea picture that shows translation, reflection, and rotation.
1.
Discuss with students the patterns they have been making over the last 3 sessions. Explain that they will be making a picture that shows all 3 transformations.
2.
Give the students the picture page or one of your choosing. Explain that they will need to make the other half of the octopus. Name the animals in the picture and explain that sea stars (or starfish) are usually found at the bottom of the sea. They will need to cut out the pictures, but they don’t need to use them all in their underwater sea picture. The images provided could also be native New Zealand sea creatures.
3.
Ask the students:
- Which animal shows reflection? (Octopus)
- How else could you show reflection in your picture? (Put two fish nose to nose.)
- How could you show the translation in your picture? (Use 2 or more of the same animal and orientate them the same way.)
- How could you show rotation in your picture? (Use 2 or more sea stars and rotate each one.)
4.
Help the students complete the octopus. Ask the students to cut around the box, fold it in half on the dots, cut around the shape, and open it out.
5.
Students cut out the other animals, coloured them, and glued them to blue paper. Remind the students that the finished picture needs to show translation, reflection, and rotation.
6.
Students share their pictures with each other. Individuals look for the translation, reflection, and rotation elements in each other's pictures.
Home Link
Dear parents and whānau,
This week, we have been making patterns. Your child is going to be a pattern detective and look for patterns in the home and in their neighbourhood that show translations (a picture or pattern that repeats to make a pattern) or rotations (a picture or pattern that repeats around in a circle). One place to look for these is in wallpaper or tiling. These patterns can also be found in nature. Please ask them to explain what is happening in the patterns they find.
The quality of the images on this page may vary depending on the device you are using.